Example 6 Continued - Fades to Black and
Fading-in
We will continue the discussion
of fades and transitions by showing how fade to black or a fade in
from black or white can be accomplished. To do this we must use
a clever trick. We create a small file that is all black and
one that is all white. We have named these (cleverly) in the
Example 6 download as black.jpg and white.jpg. We will create a
simple movie that fades-in from white and then fade-outs to black.
This will leave a black box on the screen so we will then show a fade
out to white.
Any background can be matched by creating a file to
fade to that is the target (or vice versa).
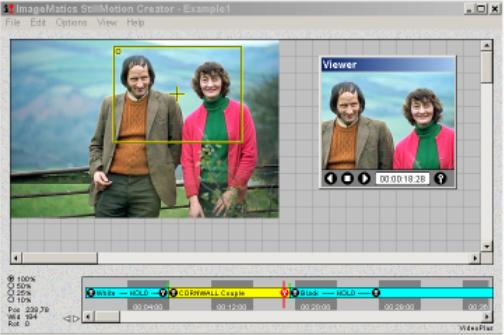
Step
4 The File White.jpg is loaded in the timeline.
Camera
Window is moved to the center of the white image. As long as
all the white is covered the position is not important. We then
created a hold so nothing happens in the segment (see
Example 3 on
how to create holds)
Next we loaded Couple.jpg and created
a simple zoom-n over the couple's faces. We then loaded the black
file, Black.jpg and added a hold. Figure 4 shows what the
screen looked like after the operations where completed.
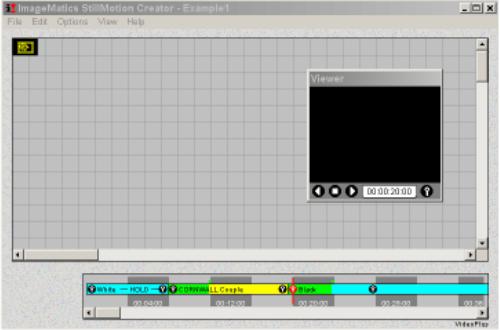
Step
5 Then expand the transition times on the
Timeline as we showed
in Step 3 of this example.
Figure 5 shows the
screen with the Timeline Cursor located over the beginning of the
black image.
Note:
• The black image is very
small. It could actually be a lot smaller but would be hard to
show. Since the file size of this image gets added in to the
SWF file we want it as small as possible. The limiting size is
how small the Camera Window can be made. Can get it down to 2 pixels
in width. A file 10 pixels x 10 pixels is a good practical size
for your fade-to files.
• The Viewer shows all black. This is because we are looking at
an all black file
Figure 6 Fade from white and fade to black
Step 6 Create the Flash Movie as in
Example 1 by Selecting the
Make Flash SWF Movie entry under the File Menu. See
Example 1 Step 4 for details. Figure
6 is the result.
In the next step we will
replace the black file at the en with a white one creating a fade-in
fade-out
Exercise:
Try creating a cross-fade through black in which
two image segments fade to black and then fade from black. A
cool effect
Figure 7 Fade from white and fade to white
Step 7 Create the Flash Movie as in
Example 1 by Selecting the
Make Flash SWF Movie entry under the File Menu. See
Example 1 Step 4 for details. Figure
7 is the result.
 Step
4 The File White.jpg is loaded in the timeline.
Step
4 The File White.jpg is loaded in the timeline.
 Step
5 Then expand the transition times on the
Step
5 Then expand the transition times on the