|
Example 6 How to Fade Between Images and How to
Fade to Black
In this example we will show how to create fades
between images and how to fade to black. We will use the files
in Example 5 to illustrate this.
The files associated with this example may be
downloaded by clicking on the download icon. The files are
contained in a self extracting .exe so simply click on the downloaded file and the test files and resulting SWF file will be loaded into
your selected directory. Click on the Download Icon to download
the Example 6 files.
 Step
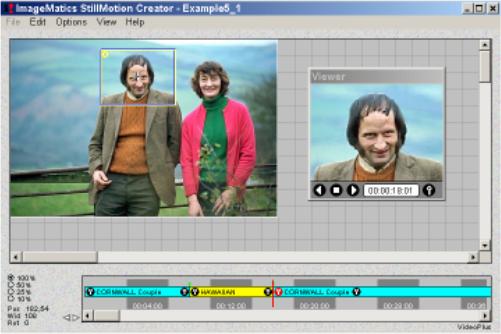
1 Here is the Show Movie that was created in
Example 5. We will
insert cross fades (one picture fades into the other) at each Image
load point. We will make the fades of 4 second durations Step
1 Here is the Show Movie that was created in
Example 5. We will
insert cross fades (one picture fades into the other) at each Image
load point. We will make the fades of 4 second durations
Detail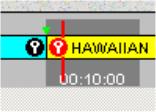 The Detail image of the
Timeline shows Fade Marker
(green triangle) on the Timeline. A fade is created by grabbing
the Fade Marker with the mouse and dragging to the desired length of
the transition.
The Detail image of the
Timeline shows Fade Marker
(green triangle) on the Timeline. A fade is created by grabbing
the Fade Marker with the mouse and dragging to the desired length of
the transition.
|
 Step
2 In this step we stretch the Fade Indicators to create the
transition of the desired time. The
Step
2 In this step we stretch the Fade Indicators to create the
transition of the desired time. The